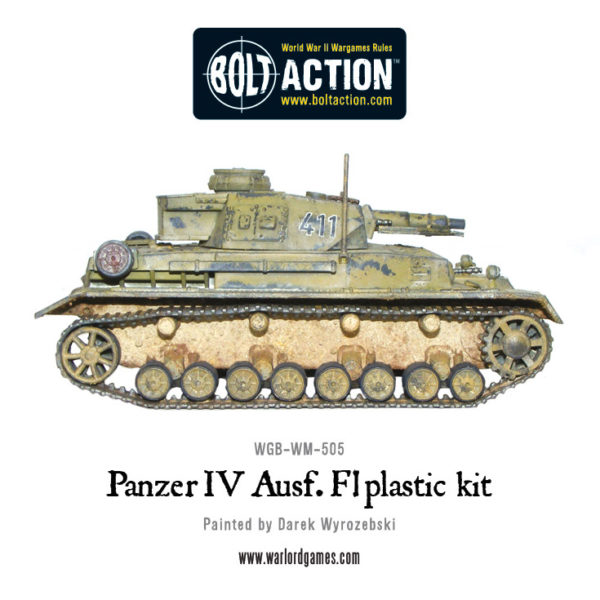
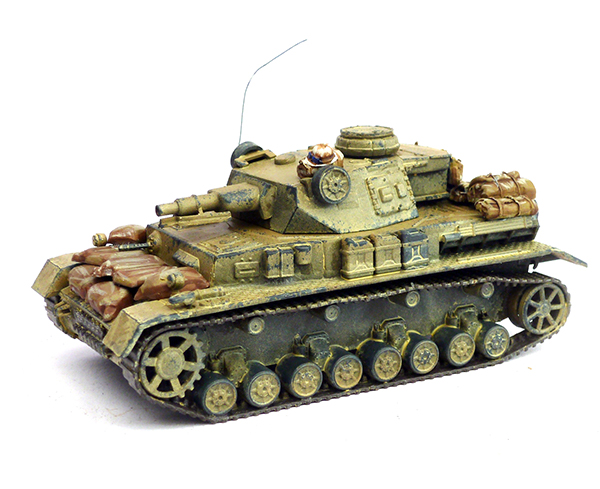
Following on from the DAK Panzer IV Andy Singleton painted a few weeks ago (which you can check back to here) he’s now gone on to add some stowage and bring the vehicle to life with a ‘lived in’ look.
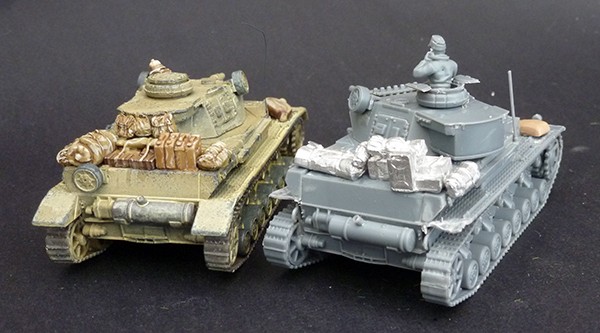
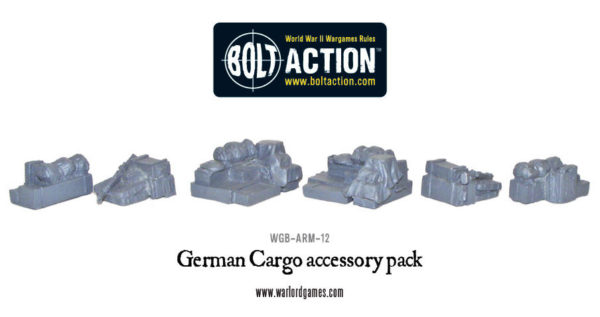
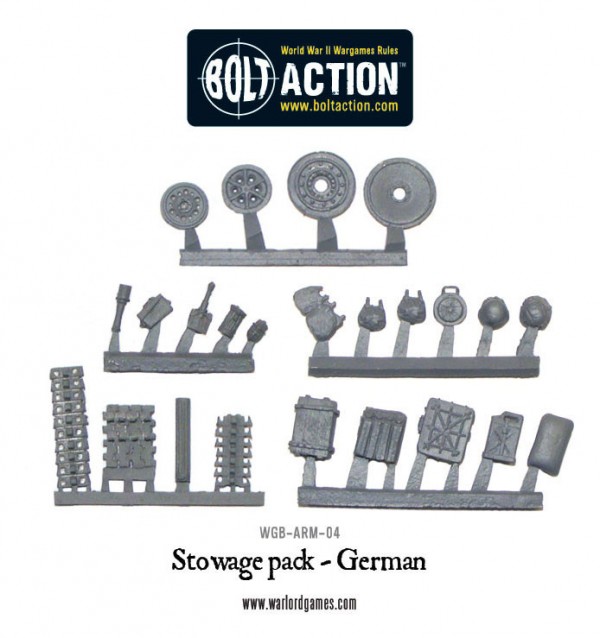
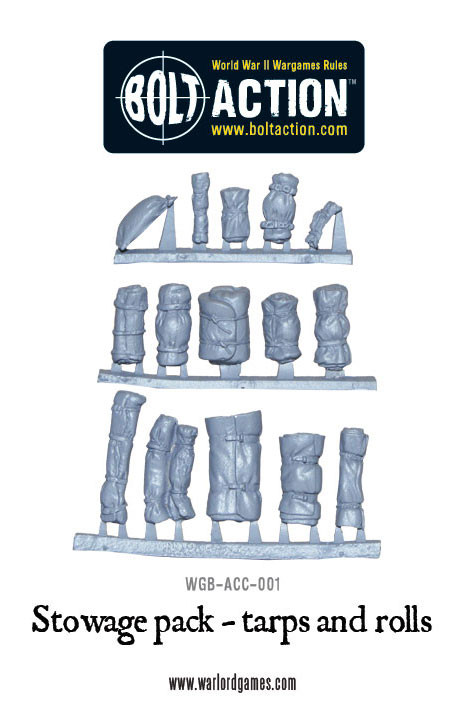
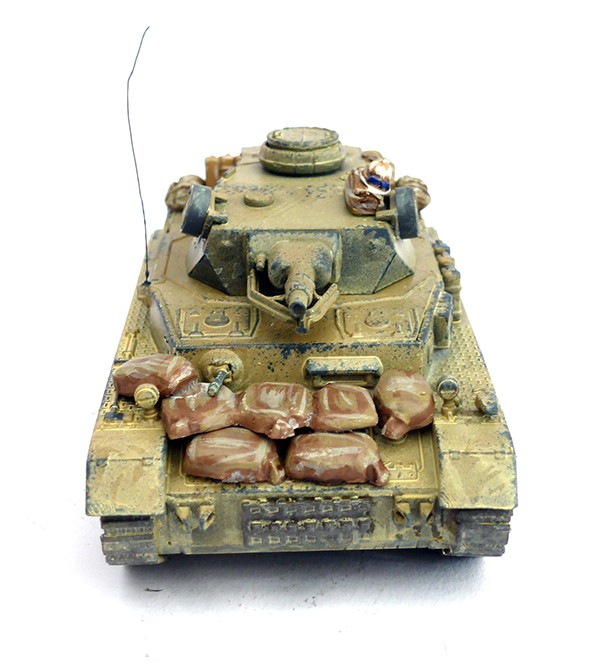
Andy: For this model I’ve used quite a few of the stowage sets that Warlord produce, In this case the German stowage set, the tarps and rolls set, and I’ve also used the German cargo set for truck loads as well on some other vehicles, more on that later… I’ve also used a few of the sandbags from the sandbag set.
When it comes to adding stowage to a model it’s very easy to get excited and pile as much as you can onto the vehicle, however there are a few little tricks to give the model that extra level of realism.
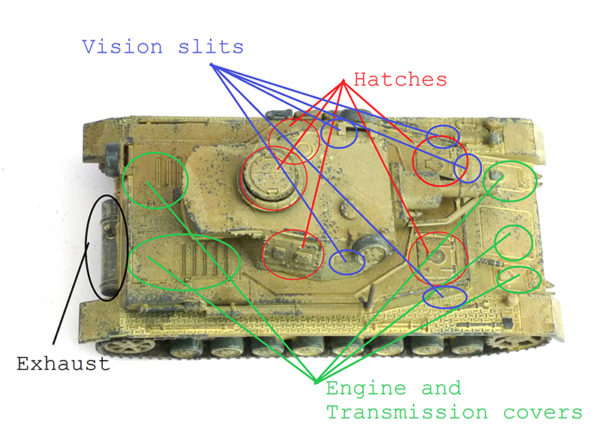
I’ve made a masterwork of artistic rendition to show the important areas to be mindful of on your vehicles, in this case I’ve used the Panzer IV, but the principle applies to any vehicle If you are unsure what something is, there’s plenty of good images that show up with a quick image search of your chosen battlewagon.
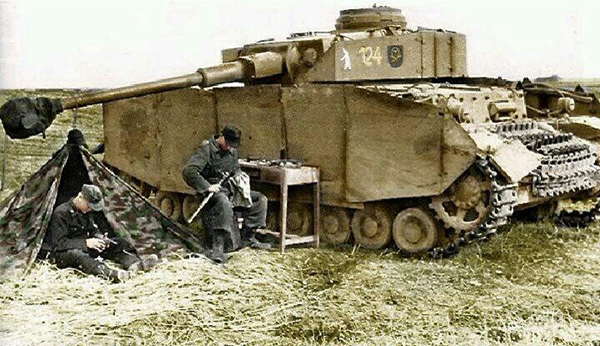
- 1) Keep fighting areas clear, so try not to block your turret’s movement and machine gun positions. No-one wants their sleeping bag at the business end of an MG-42 after all…
- 2) Keep hatches and escape routes clear! ‘Oh no, Fritz has strapped a ration box over the escape hatch…!’
- 3) Visibility from a tank is limited at best, so any vision slits are a pretty high priority, the most important one to keep clear is the drivers, these can usually be identified as a letter box shape on the front of German vehicles, a porthole on British armour, a big hatch on Russian tanks and a periscope on American armour. Pretty important one, try stacking the shopping on your windscreen next time you go to the supermarket to find out why. (DON’T!!!).
- 4) Engine and transmission housings, these are the maintenance access points, although some engine decks do have vents as well for ventilating the engines, this is mostly a German thing and help to keep the engines cool and running healthily.
- 5) Exhaust. You can spot these towards the rear of your vehicles and they tend to look like tubes or barrels, sometimes single and sometimes in pairs. Keep them clear of gubbins.
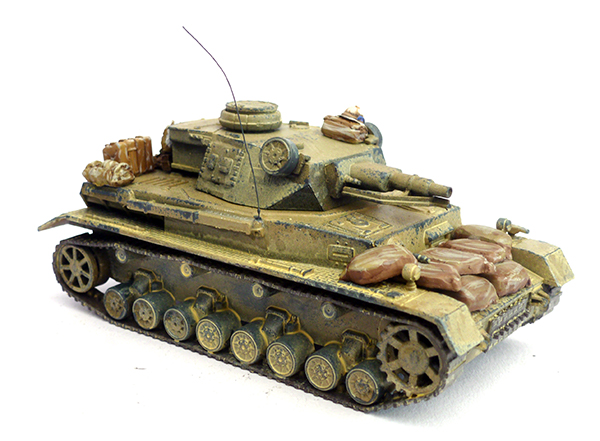
With my Panzer IV I’ve gone for a mix of stowage, using some spare jerrycans along the side, the white crosses were used to denote drinking water, and to keep the can’s free of fuel. The sandbags at the front are for a little more armour protection for the crew, whilst the bags and other equipment scattered around most likely contain things like tarpaulins and the crew’s personal effects.
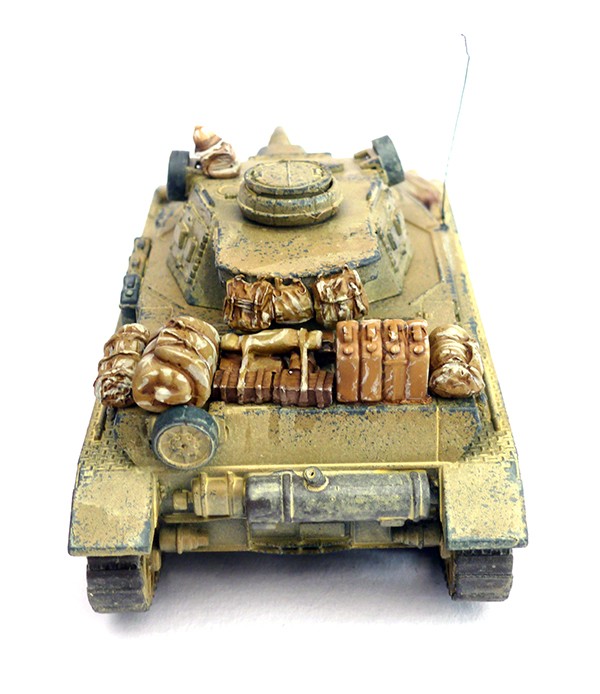
I also replaced the kit radio antennae with some 5 amp fuse wire, not only does this give the model a more scale appearance, but it is actually tougher and less prone to breaking than the plastic one.
As part of my ongoing Operation Sand dune project I’ve started to work on some more of my armour, following the same principles as on this Panzer IV, but also adding a little extra in the way of battle damage by trimming the fenders and skirts to give the tanks a battle worn look.
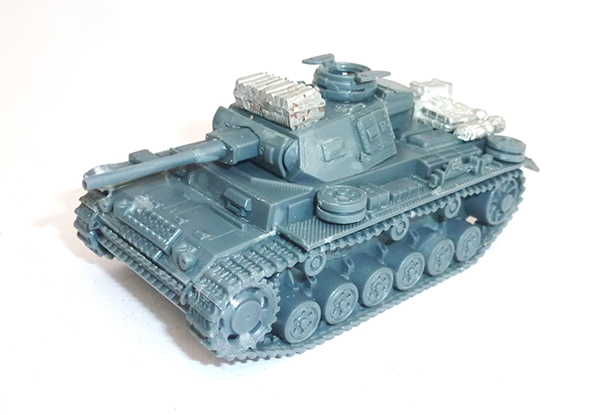

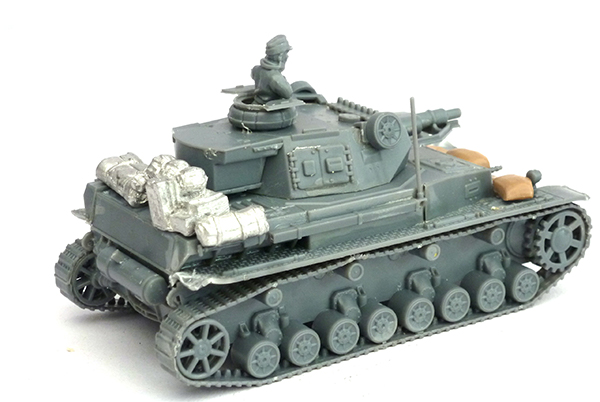
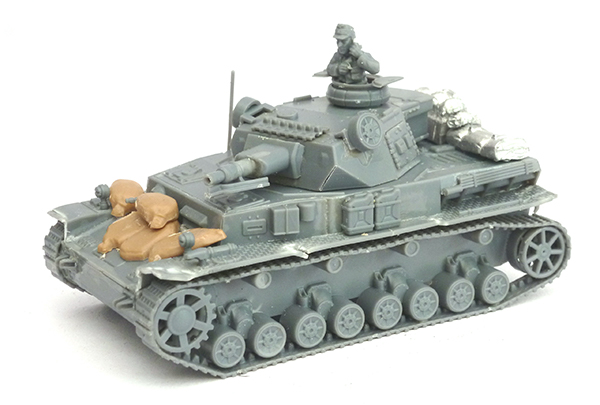
I also discovered that the truck loads fit the engine deck of a Panzer III with some room to spare for the turret to still move, and looks very cool to boot I’ve attached a few pics of these here too as the unpainted models highlight the fitting of the stowage a little more.
When it comes to painting stowage on a model personally I like to fit it before painting, however it’s entirely down to personal preferences, there’s no right or wrong answer.
Happy gaming!
Show us your collection of modified vehicles by dropping us a line with a couple of pictures to the Warlord Facebook page or share with all over at the Warlord Forum