Following-on from last week’s article showcasing his Zis-30 conversion, hobbyist Jakob Lotz has been hard at work on his latest creation – and this week, we’re proud to present his Flakpanzer I.
Jakob has been extremely generous in creating a step-by-step guide on how to recreate this vehicle – and there should be more of his work coming shortly!
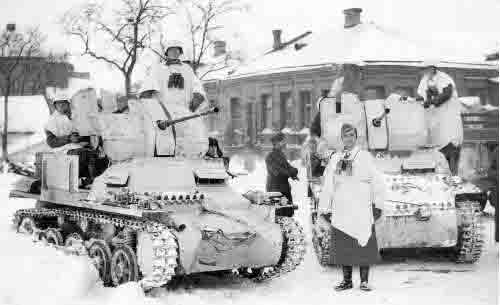
The Flakpanzer I (designation was Sd.Kfz.101) was a rare self propelled anti-aircraft gun conversion of the Panzer I in use by Germany during World War II.
The Flakpanzer I was developed during the Battle of France when it was recognized that the existing motorised flak gun was insufficiently armoured. It was therefor decided to combine light anti-aircraft guns with tank chassis. As the Panzer I was becoming severely outdated as a regular tank and since there were several chassis of this type available it was used for these conversions.
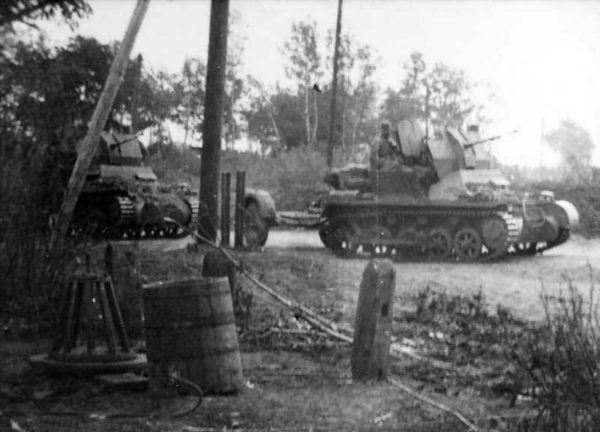
In total, 24 of these vehicles were built. Alterations were made to the chassis in order to accommodate the anti-aircraft gun as well as to gain more even space for the operators to stand on. Flaps were added to the sides and rear part of the tank. These flaps were made from simple sheet metal and did not offer real protection, but could be folded down and used to stand on. The tanks were armed with the Flak 38 20mm anti-aircraft gun.
Only one unit, the Fla.-Btl.(mot) 614 (motorized flak battalion 614) was equipped with the Flakpanzer I. The unit was assembled in 1941 and only took part in the fighting on the eastern front. In service the vehicles were used against both air and ground targets. However due to the design of the vehicles, effectiveness against air targets was questionable. Furthermore the protection for the crew was insufficient, leading to high losses when used against ground targets. The whole battalion was wiped out in 1943 and it is somewhat unclear if there were any still operational at the Battle of Stalingrad.
WHAT YOU NEED
- A Panzer I ausf. A.
- A German Heer 2cm Flak 38.
- One pair of kneeling legs from the German infantry plastic kit.
- Plasticard.
- Green stuff.
- Small diameter plastic rod.
- Brass rod (or equivalent – I used part of a standard paper clip just cut to lengh, however be sure to use appropriate wire cutters since the hobby variants are usually only designed to handle the softer metal that miniatures are made of and as such will become deformed (and useless) if you try and cut harder materials with them).
- Piercing saw, craft knife, wire cutters, drills, glue, etc.
HOW TO PUT IT ALL TOGETHER
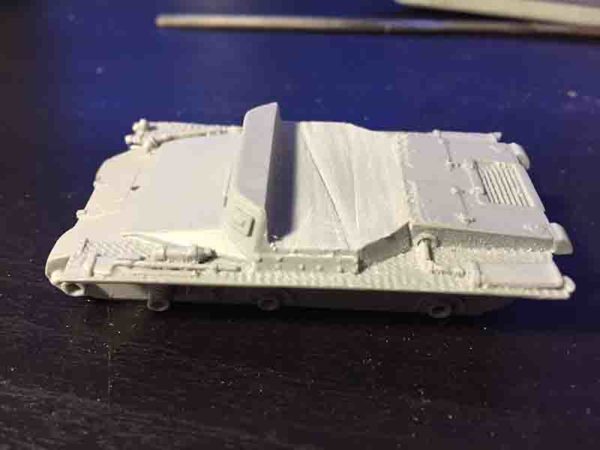
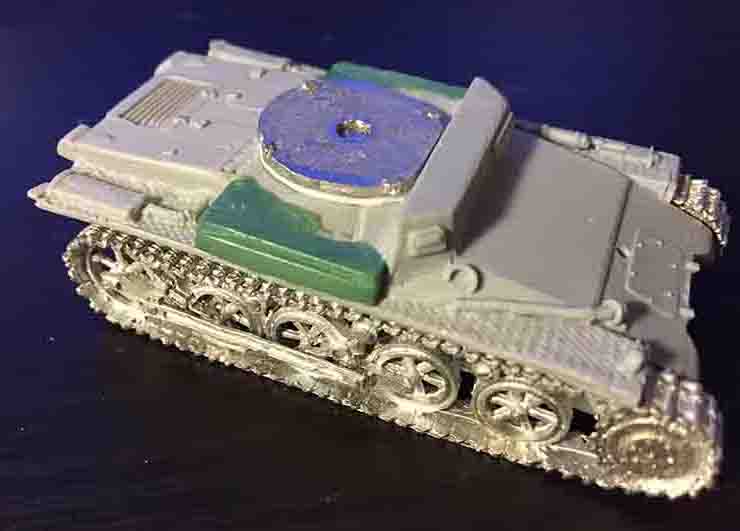
First of all remember to clean all the resin parts in some warm water and soap. Then take your piercing saw or similar tool and cut away part of the Panzer I tank chassis as shown below.
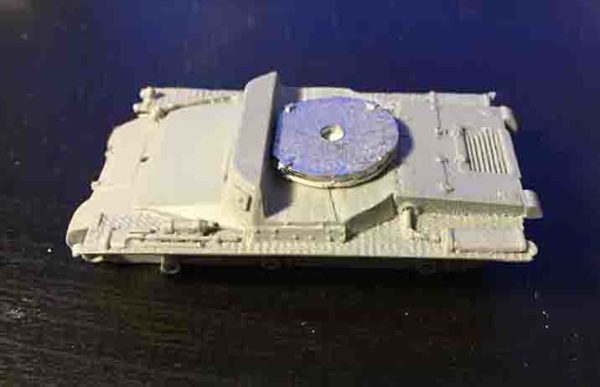
 Next take the Flak 38’s platform and cut away the supports so that you end up with a round base. Then glue a round piece of (approximately 1 mm thick) plasticard to the bottom of the now round Flak 38 platform as shown below (this is so that the gunshield of the flak 38 doesn’t get caught up on the Panzer I chassis).
 Next up get some green stuff and build out the sides of the platform as shown in the next picture. This is were patience comes in to it (at least for me) as getting the green stuff even and square is not easy (remember to use water on the tools you use since this will stop the green stuff from adhering to them instead of the tank). Finally I made an indentation on each of the sides in order to make it easier and create a better hold for when I glued the plasticard flaps on.
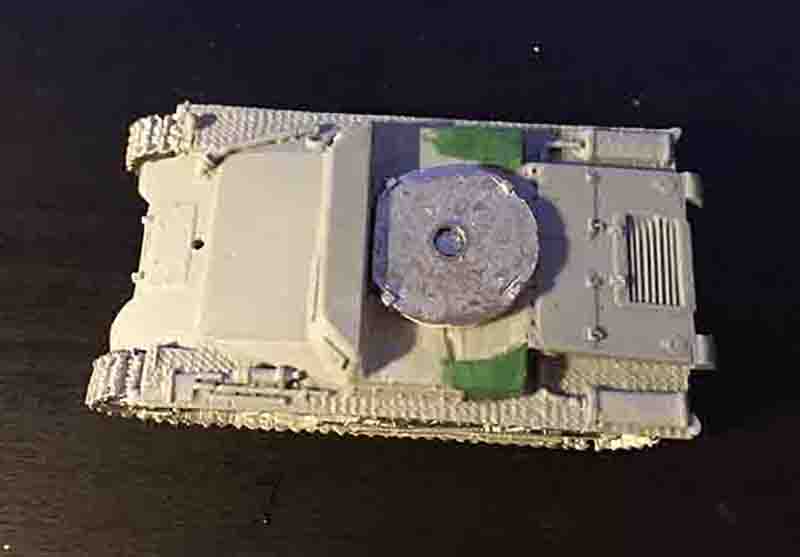
Next add the side flaps made from 1mm thick plasticard and approximately 1×3 cm in size. The rear flap is roughly 1×3.5 cm with the two of the corners trimmed so that it fits in between the two little parts found at the rear of the Panzer I. If you want you can add struts or supports to the underside of the flaps with more pieces of plasticard glued to the underside.
I opted to cut off the barrel of the Flak 38 and replace it with an equal length of metal rod cut from a regular paperclip to which I then added two short pieces of plastic rod (approximately 2mm in diameter). I filed the front one into a conical shape to get the right shape for the muzzle.
I also cut the second Flak 38 crew member off at the waist and dug out some the metal from behind his arms in order to get him to fit onto the kneeling legs from the German infantry plastic kit.
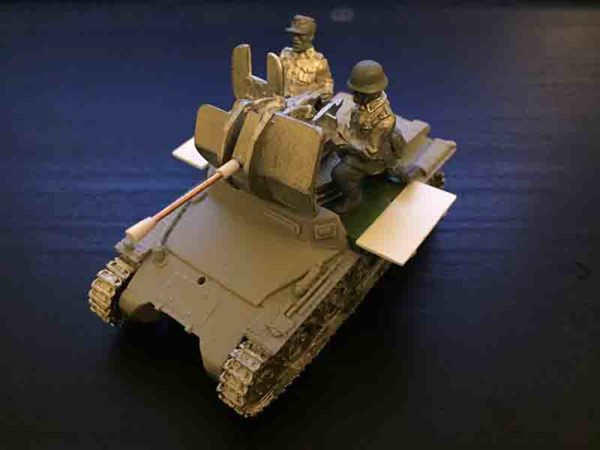 Next I basecoated the whole model. First black and then uniform grey (the Army Painter spray variant).
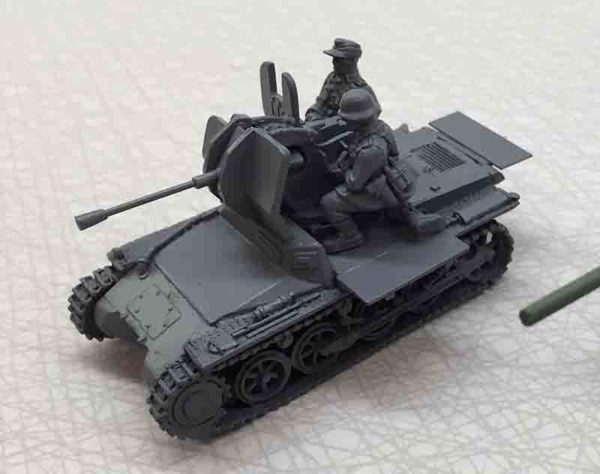
I then washed and drybrushed the entire model grey.
 After some more paint and a new wash of black and brown I ended up with this.
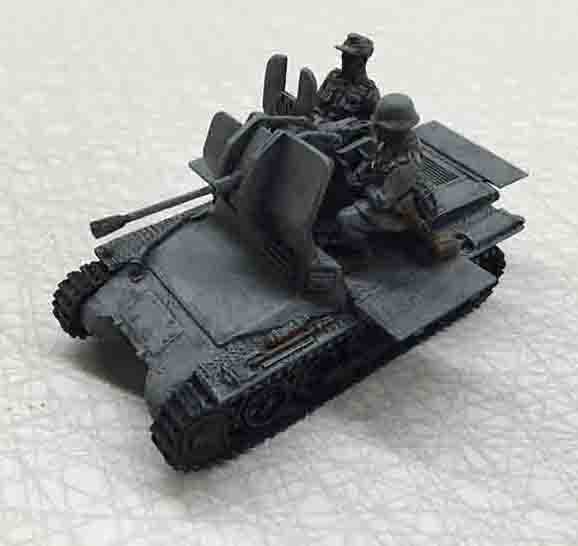
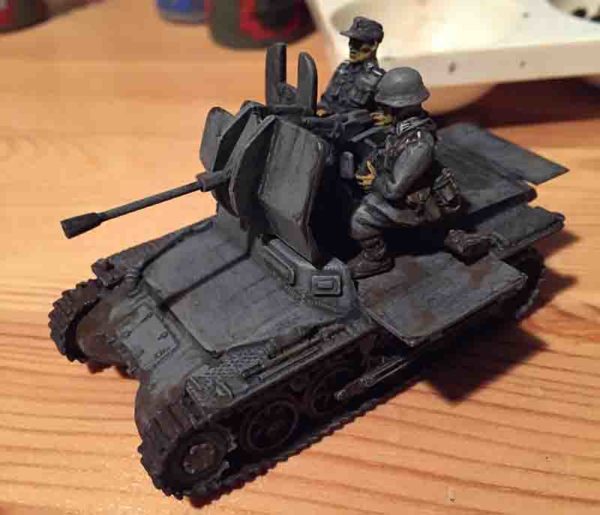 Finally I added some mud to the tracks and the Flakpanzer I was ready for the table:

HOW TO USE IT
Now there aren’t any specific rules published for this little bad boy at the moment, however I reckon that the profile for the SDKFZ 251/17 pretty much fits the bill. The 360 degree arc of fire can be debated but as long as you simply use the front arc field of fire you should be good.


