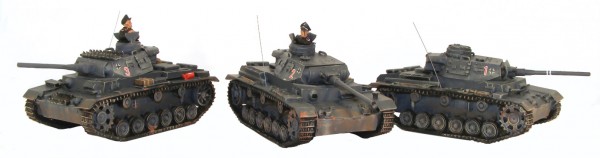
If you met a tank on the battlefield in WW2, and then another, chances are they would both be the same type, as all vehicles were organised in troops, zugs, comapanies, platoons, etc. Whilst it is great fun to field all manner of exotic tanks, it is also quite satisfying to roll out three of a kind and see how thay do in completing the mission.
To experiment, I took home three of the lovely new Panzer III’s, perhaps my favourite German tank. If you asked a kid to draw a tank , it would look something like a Mark 3 – it’s a classic…
I have a rule now with vehicles: They get no more than one hour of painting, then its off to the front line with them! These three had 120 minutes spent on them in total, and I reckon they don’t look too shabby, though looking at some of the stuff on our site, maybe I am kidding myself!

I used a knife to clean off any flash, gave them a quick wash under a warm tap with some soap (as sometimes release agent can make the paint peel), let them dry, then sprayed them all over with Army Painter matt black.
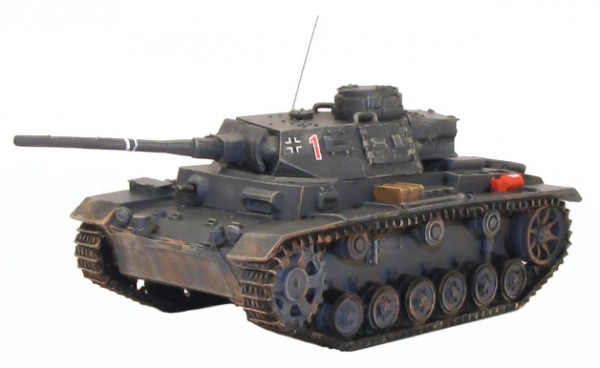
This was dry in 20 minutes, and so to the base coat. I used Vallejo Panzer grey, but mixed in a good dollop of white to lighten the effect. Using the dark grey on a small model makes it look too dark, almost black, and that’s not what I wanted. The base coat was simply brushed on with a big tank brush and left to dry.
Next I painted the rubber tyres in a very dark grey and the machine guns in black. Painting the spades, axes etc etc is always good fun, but needs a steady hand. Tracks are also painted at this stage and can vary in colour from dark metal to brownish rust.
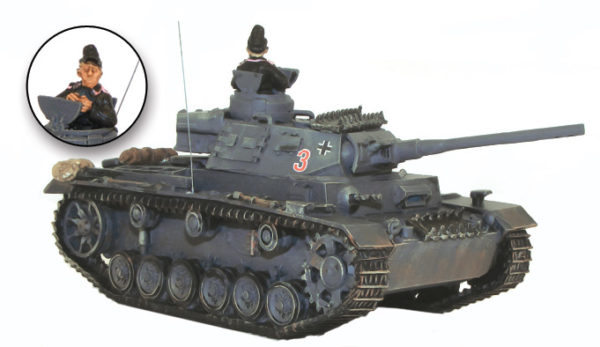
I wanted each tank to look a little different, so only crewed two, again with differing commanders – that’s the joy of the Figure Head system. I then added some spare track to the turret roof of one, plus a jerrycan and some tarpaulins and stowage to make them more individual. On one tank I painted 3 kill marks on the 50mm gun and then applied the Balkan crosses and some simple turret numbers, which varied wildly at times on all fronts.
Next came a good application of Russian mud to the bogeys and tracks, trying to get it to look splashed backwards, and then, when that was dry, a vigourous dry brushing of Iraqi Sand paint (though any light grey/off white will do!) applied with a large brush to coat all of them in the inevitable dust that all tanks suffered from.
I finished them with broom bristle antennae, and then sprayed them with Army Painter matt varnish to seal it all.
Well, that’s how I do it anyway! They are driving into their first battle next week… “Panzers, Marsch!”