By Stephen May
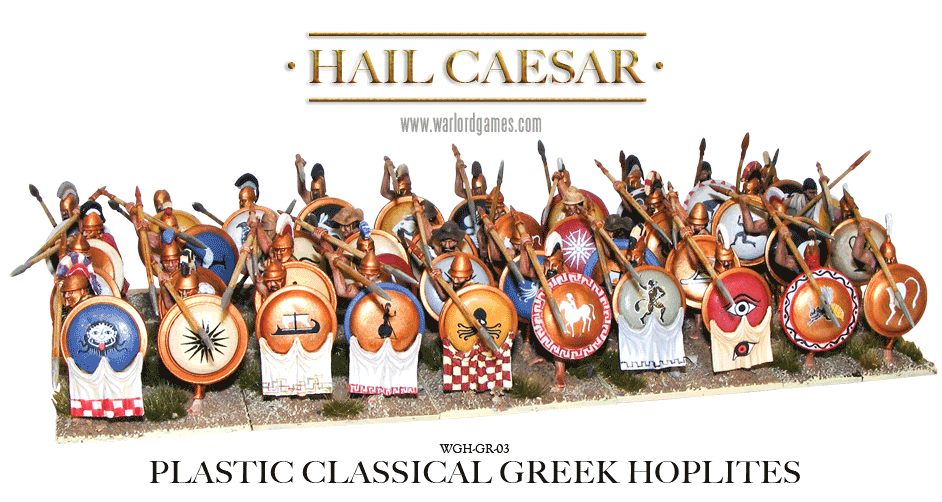
In this guide, I will walk you through the methods in which I paint my figures, specifically my plastic hoplites. The guide has been written using the Citadel paint range, as it is what I prefer to use, however below is a quick reference guide where you can substitute most of the Citadel paints for Army Painter/Vallejo Model Color paints.
One important method you should use is to water the paints down slightly and use multiple layers to cover an area. Although it takes a little longer, this prevents the paints obscuring the detail of the figure and gives a much smoother finish. Also, it is a good habit to try and be as neat as possible when applying the colours, it will save on tidying up mistakes in between stages.
Listed below are the colours I used in this guide:
Foundation paints:
- Dheneb Stone (Army Painter – Drake Tooth)
- Khemri Brown (Vallejo – Green Brown)
- Mechrite Red (Vallejo – Red / Army Painter – Vampire Red)
- Tallarn Flesh (Vallejo – Brown Rose)
- Iyanden Darksun (Vallejo – Goldbrown)
- Fenris Grey
Colour paints:
- Skull White (Vallejo – White / Army Painter – Matt White)
- Chaos Black (Vallejo – Black / Army Painter – Matt Black)
- Graveyard Earth (Vallejo – US field drab / Army Painter – Leather Brown)
- Bleached Bone (Vallejo – Buff / Army Painter – Skeleton Bone)
- Dwarf Flesh (Vallejo – Brown Sand / Army Painter – Barbarian Flesh)
- Bestial Brown (Vallejo – Flat Brown)
Washes:
- Asurmen Blue (Army Painter – Blue Tone Ink)
- Gryphonne Sepia (Army Painter – Soft Tone Ink)
- Devlan Mud (Army Painter – Strong Tone Wash)
- Baal Red (Army Painter – Red Tone Ink)
Metallic paints:
- Dwarf Bronze (Vallejo – Bronze / Army Painter – Weapon Bronze)
- Chainmail (Vallejo – Natural Steel / Army Painter – Plate Mail Metal)
Stage 1
When the glue was dry I then undercoated them with The Army Painter’s Black undercoat spray, using several short bursts of spray from around 6-8 inches away so I didn’t clog up the fine detail with paint. I find it best to paint between 4-8 figures at a time.
Stage 2
Paint all of the skin with Tallarn Flesh (Vallejo – Brown Rose). All of the areas that will be bronze should be painted with Iyanden Darksun (Vallejo – Goldbrown), as should the spear shaft. This looks a bit strange at this stage, but it gives a good base colour for the metallic paint. The backs of the shields were painted with Khemri Brown (Vallejo – Green Brown).

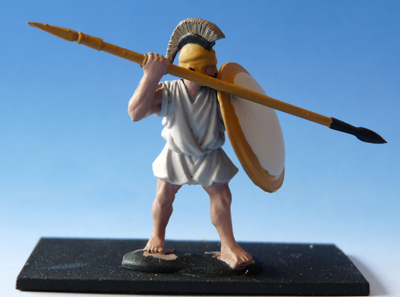
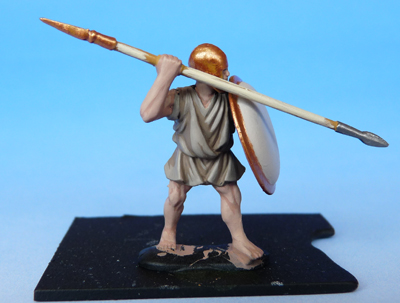
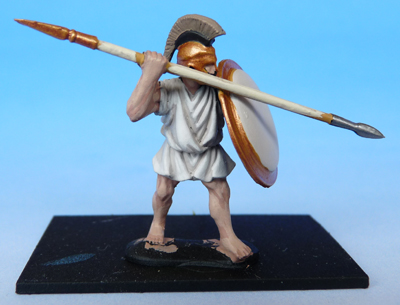
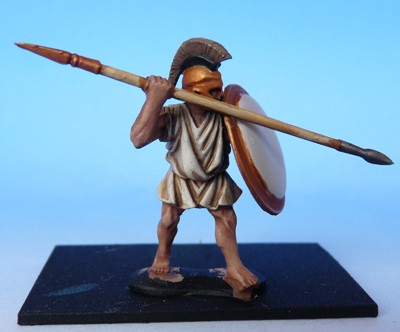
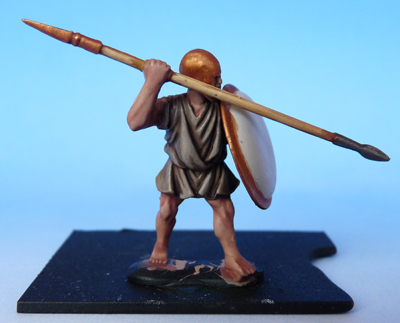
Unarmoured Hoplites:
I have painted two unarmoured hoplites to show different colours of tunics. One was painted with Khemri Brown (Vallejo – Green Brown) and the other with Dheneb Stone (Army Painter – Drake Tooth). As I didn’t want the shields to be covered with bronze I also painted the facings with Dheneb Stone (Army Painter – Drake Tooth). The crest of one figure was painted with Khemri Brown (Vallejo – Green Brown).
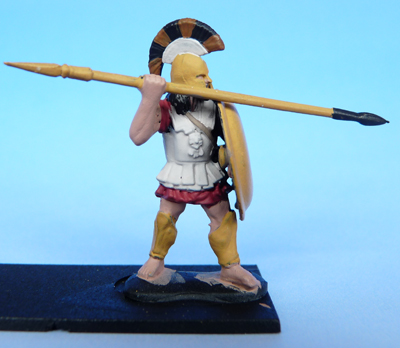
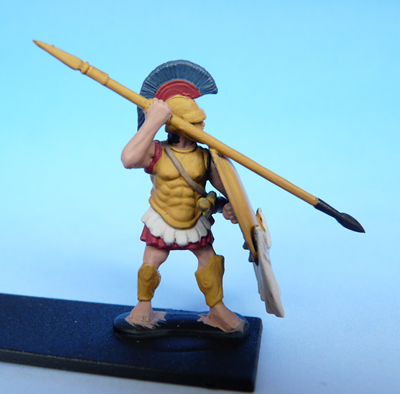
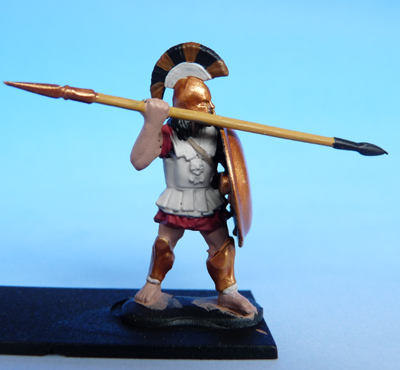
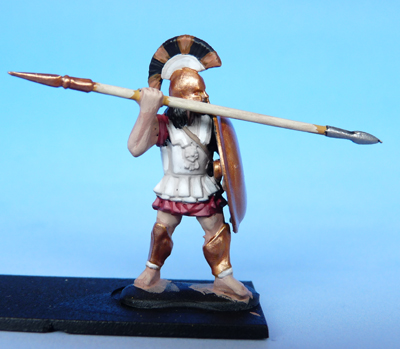
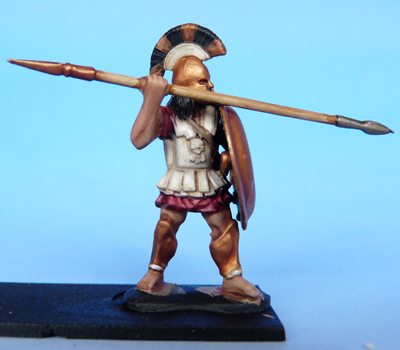
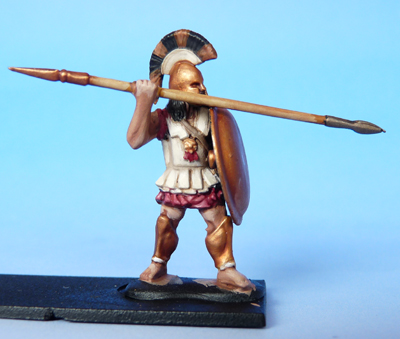
Armoured Hoplites:
I chose to paint the tunics with Mechrite Red (Army Painter – Red / Vallejo Vampire Red). One crest was painted Fenris Grey and the other was painted with stripes of Bestial Brown (Vallejo – Flat Brown). One crest holder was painted Mechrite Red (Army Painter – Red / Vallejo Vampire Red) and the other Dheneb Stone (Army Painter – Drake Tooth).
The scabbards were painted with Khemri Brown (Vallejo – Green Brown). The linen cuirass and the pteryges were painted with Dheneb Stone (Army Painter – Drake Tooth), as were the greave padding and the shield curtain on one figure.
Stage 2
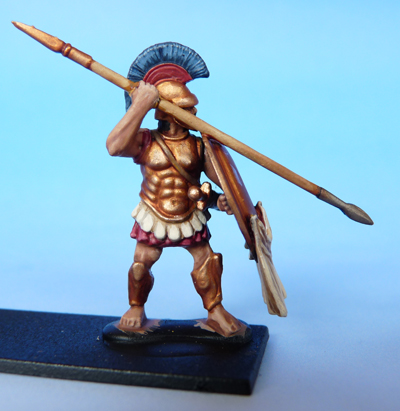
All Figures:
Right now, the figures look like Etruscan tomb paintings! So for this stage, all that is required is to paint all the areas you wish to be bronze with Dwarf Bronze (Vallejo – Bronze / Army Painter – Weapon Bronze).
Stage 3
All Figures:
The raised areas of skin, particularly the fingers, knuckles and muscle shapes were highlighted with a 50/50 mixture of Tallarn Flesh (Vallejo – Brown Rose) and Bleached Bone (Vallejo – Buff / Army Painter – Skeleton Bone).
The raised areas of bronze were highlighted with an 80/20 mixture of Dwarf Bronze (Vallejo – Bronze / Army Painter – Weapon Bronze) and Chainmail (Vallejo – Natural Steel / Army Painter – Plate Mail Metal). Pay particular attention to picking out the structure of the muscle cuirass and the shapes of the greaves. Otherwise, pick out the edges of the shield, butt spike and helmet. The spear-head was also painted with Chainmail (Vallejo – Natural Steel / Army Painter – Plate Mail Metal), although bronze can also be used here.
The spear shafts were highlighted with Bleached Bone (Vallejo – Buff / Army Painter – Skeleton Bone), applied in rough horizontal lines down the length.
Unarmoured Hoplites:
One tunic was highlighted with a roughly 50/50 mixture of the Khemri Brown (Vallejo – Green Brown) and Dheneb Stone (Army Painter – Drake Tooth), as was the shield facing (check the shield guide for this). The crest on one figure was also highlighted with this mixture, applied in vertical lines thickening towards the crest top.
The other was highlighted with a roughly 50/50 mixture of the Skull white (Vallejo – White / Army Painter – Matt White) and Dheneb Stone (Army Painter – Drake Tooth).
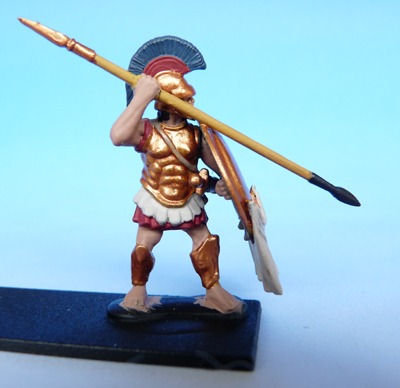
Armoured Hoplites:
The tunics were highlighted with a 60/40 mix of Mechrite Red (Army Painter – Red / Vallejo Vampire Red) and Bleached Bone (Vallejo – Buff / Army Painter – Skeleton Bone), as was one of the crest holders.
The linen cuirass and the pteryges and other crest holder were highlighted with a roughly 50/50 mixture of the Skull white (Vallejo – White / Army Painter – Matt White) and Dheneb Stone (Army Painter – Drake Tooth). Pay close attention to highlighting the individual pteryges, without going over the edges. Also highlight the cuirass in this way, leaving a line of the base colour close to the edges. This helps the define the armour.
The crests were highlighted with a 60/40 mixture of their base colour and Bleached Bone (Vallejo – Buff / Army Painter – Skeleton Bone).
Stage 4
All Figures:
Now for the fun parts, applying the washes! You can apply some washes at the same time, as long as they will not touch each other. Otherwise, you will have to wait for the previous one to dry before applying the next. These dry pretty quickly, so if you are painting a few figures at once the first figure may be dry when the last is finished.
For the skin, prepare a mixture roughly 10/20/30/30 of Dwarf Flesh (Vallejo – Brown Sand / Army Painter – Barbarian Flesh), Graveyard Earth (Vallejo – US field drab / Army Painter – Leather Brown), Baal Red (Army Painter – Red Tone Ink) and Devlan Mud (Army Painter – Strong Tone Wash). Add some clean water to this until it is a little thinner than the consistency of milk.
I usually do this by eye so the amounts do not have to be precise, it can look nice to have a variety of skin tones throughout the phalanx. Apply this mixture over all of the skin. Multiple layers can be painted on when the previous one is dry to darken it.
All areas that are painted with the Dheneb Stone (Army Painter – Drake Tooth) linen colour (except the shields) can be washed with a 50/50 Graveyard Earth (Vallejo – US field drab / Army Painter – Leather Brown) and water mix, with a drop of Gryphonne Sepia (Army Painter – Soft Tone Ink)
added to help it flow evenly.
Red areas can be washed with Baal Red (Army Painter – Red Tone Ink). The bronze areas, spear shaft and head can be washed Gryphonne Sepia (Army Painter – Soft Tone Ink)
.
All areas that are painted with Khemri Brown (Vallejo – Green Brown) (shield back, scabbard and strap) can be washed with Devlan Mud (Army Painter – Strong Tone Wash).
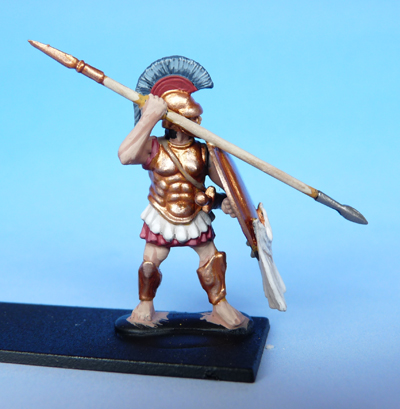
Armoured Hoplites:
The blue crest was washed with Asurmen Blue (Army Painter – Blue Tone Ink), while the brown areas of the second crest are washed with Devlan Mud (Army Painter – Strong Tone Wash). The linen cuirass and pteryges are washed with the 50/50 Graveyard Earth (Vallejo – US field drab / Army Painter – Leather Brown) and water mix which was mentioned earlier.

Stage 5
All Figures:
When thoroughly dry you can add the last details and highlights, the highlights at this stage would only be applied the highest raised areas. I highlight the knuckles, knees, elbows and thigh muscles with a 70/30 mixture of Tallarn Flesh (Vallejo – Brown Rose) and Bleached Bone (Vallejo – Buff / Army Painter – Skeleton Bone) to help define them. Any hair or beards can be tidied up with Chaos Black (Vallejo – Black / Army Painter – Matt Black). The cord on the back of the shield is picked out with Dheneb Stone (Army Painter – Drake Tooth) and the fastenings with Dwarf Bronze (Vallejo – Bronze / Army Painter – Weapon Bronze).

Unarmoured Hoplites:
Areas around the shield facing are tidied up with Dheneb Stone (Army Painter – Drake Tooth). The Tunics are highlighted with the same mixtures that were applied before the washes.

Armoured Hoplites:
The linen cuirass and pteryges can have the edging and details picked out with a 30/70 mix of Skull white (Vallejo – White / Army Painter – Matt White) and Dheneb Stone (Army Painter – Drake Tooth). The fastening on the cuirass front is painted with Dwarf bronze (Vallejo – Bronze / Army Painter – Weapon Bronze) and the ties are painted with Mechrite Red (Army Painter – Red / Vallejo Vampire Red). You can wash these with Gryphonne Sepia (Army Painter – Soft Tone Ink) to tone them down.
The shield curtain is highlighted with the same mixture as the cuirass.
And you’re finished! All that remains to be done is a coat of Anti-Shine Matt Varnish and to base the miniatures.
You can add more details to the figures now, such as decorative borders, but this will be covered in another guide.
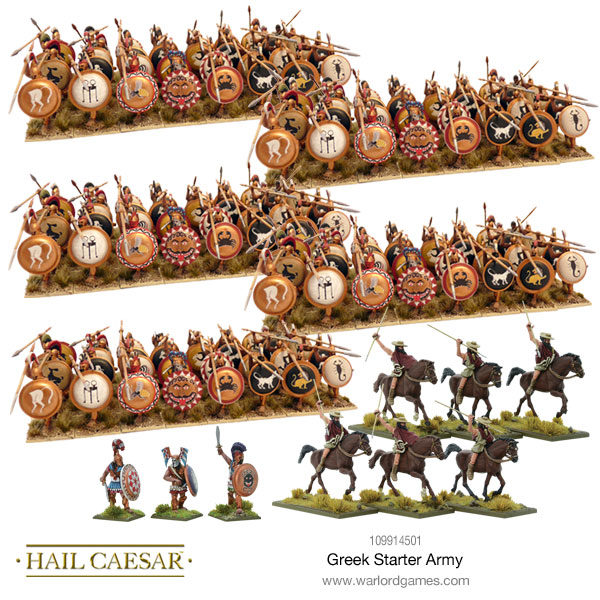
Gather your army!